The Speaker Paperish
Posted . [Last updated . ]

After puttering along with carefully-crafted, if under-powered conductive silver speakers for a few weeks, an inquiring mind pointed me towards the small, cottage-industry of DIY paper speakers using enameled magnet-wire (SparkFun). They’ve led a fairly fertile life online, courtesy of Jose Pino, who has put up a number excellent projects.
I’ve modeled these speakers, more-or-less, on his designs. See his Plastic Cup Speaker and Styrofoam Plate Speaker for some great HOW-TOs. I haven’t given the latter a try, yet, but it looks pretty good.
Paper Speaker
Bill of Materials
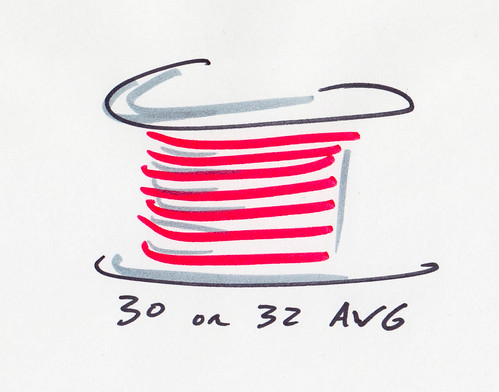
- 30AWG or 32AWG Magnet Wire (SparkFun)
This is the stuff that gets wound into speaker coils and motors and such. You can grab it on eBay or naturally enough, Amazon, but SparkFun has a nice kit of it. You’ll need more than you think. Sending an audio signal through these coils is what actually generates the magnetic field that moves the diaphragm, and ultimately, generates the sound.
This photo came out funny.
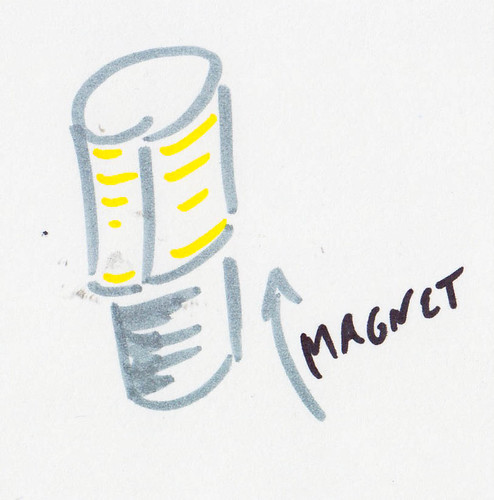
Any kind of magnet works. The stronger the better. Keep in mind that whatever the shape of your magnet, for the best sound, that’s going to be the shape of wire coil you’ll be wrapping. So larger and rounder is better. You want a magnet (or) stack, taller than it is wide. I’ve been using little rare-earth neodymium magnets, about ¼” in diameter, which are admittedly a little small for a tube diameter. For those for whom mandatory overnight shipping is a way of life (be friends with me), McMaster has some nice ones.
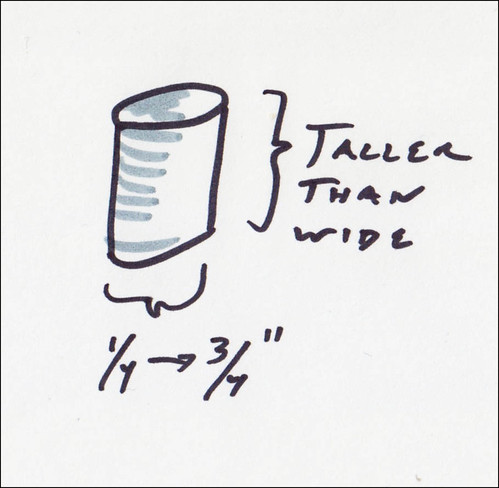
The outer dimensions of the magnet will be (slightly-smaller) than the diameter of the paper tube.
- Stiff cardstock (A business card is pretty good)
Pretty much anything works in pinch, but the sound will vary considerably with different materials. Apparently, a foam plate is ideal. It’s ugly, though.
- Glue
Elmer’s is fine. Hot glue is faster.
C’est ne pas glue.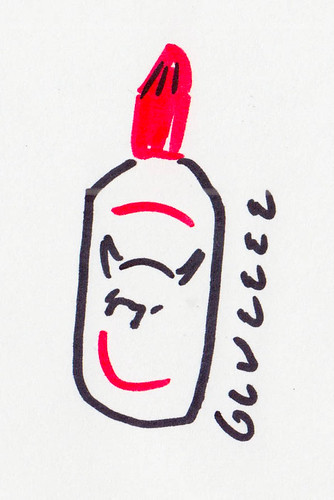
- Audio Cable (DigiKey)
This isn’t strictly necessary, but if you want to plug your speaker(s) into a proper computer or stereo or some such, you’ll need something. The easiest thing to do, probably, is just cut-off a pair of old headphones or something. Then you’ll get the ⅛” jack, as well as a ground and left-and-right channel wire. You can do this with a blade if you’re handy or a wire-stripper.

Connect the alligator clips to the end of these guys.
- Alligator Clips, pair (SparkFun)
For attaching to things: audio outputs, paper speaker wires, and so forth.
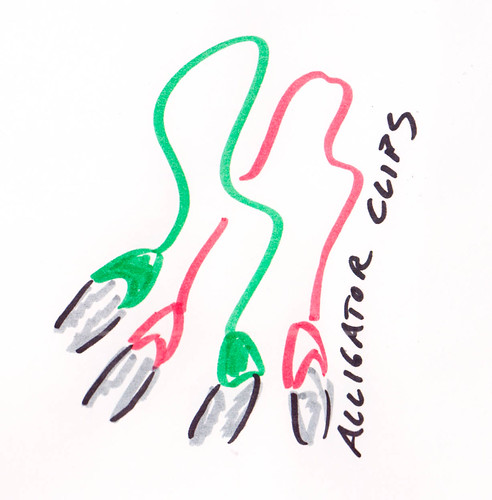
Watch your fingers.
Design
A speaker, essentially, is a coil of conductive material (wire, say, or conductive thread, or paint), and a permanent magnet. When a current flows through the coil, it generates a magnetic field. This field pushes or pulls itself against the permanent magnet. If the flowing current describes sound, then the coil moves in ways that represent that sound. That’s well and good, but so what?
What makes a speaker a speaker, and not just a bit of moving wire, is the diaphragm (read: business card), that is attached to the coil. As the card vibrates, it vibrates the air along with it. That air, my friend, that air is connected to other air, and that air vibrates too, until it vibrates right into your and your ear drum, from whence it does such mysterious things that probably, only Wikipedia knows.
The basic idea, here, is to create a paper tube that will move freely over the magnet, generating sound waves when audio is pumped through.
I hope this looks like a cross-section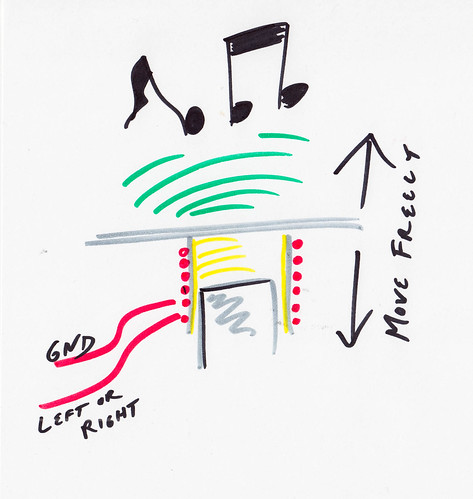
Cut out the paper tubes. You should have two—one taller than the other. You’ll see why.

Cut out the paper tube.
Wrap the paper tube around the magnet (or around a pencil, if your magnet is about that diameter). First wrap the taller tube. Then wrap the smaller. The larger tube will form a “sleeve” of sorts, that we’ll discard. This’ll give you the little gap.
Wrap the larger tube around the magnet (or a pencil, if that’s about the same diameter.
Wrap the enameled magnet wire around the smaller paper tube about fifty times. Strictly speaking, this number should vary with the particular wire and diameter you’re using. As we’re trying to build speakers that will work with a conventional headphone jack, if you have a multimeter around, we want a length that’ll give us somewhere around 8Ω.1
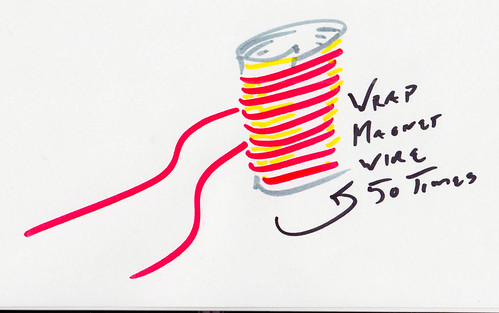
Carefully wrap the magnet wire around the tube. It doesn’t really matter how neatly you do it.
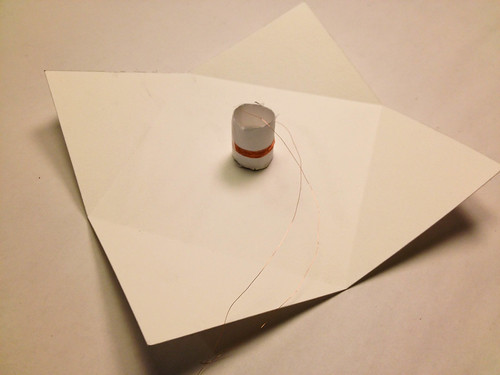
I’ve been smearing glue on the coil to fix it in place. Once you’ve made your coil, it should look something like this:
I used tape here, not glue. But glue is better.
Then, glue it to a business card.
Nifty.
Because the ends of the wire are enameled, you won’t be able to make good contact with the alligator clips. Use a bit of sandpaper, a blade, or—I’ve heard tell—an open flame.
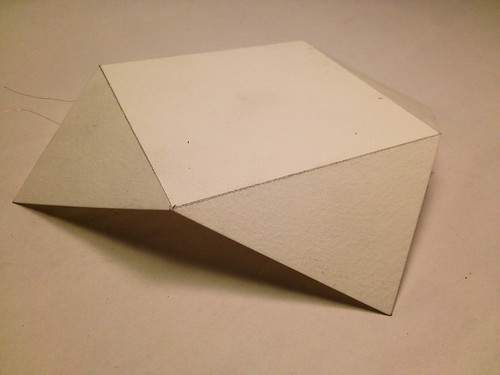
Putting it altogether (and on some little paper legs, to let things flex, you’ve got something that looks like this:
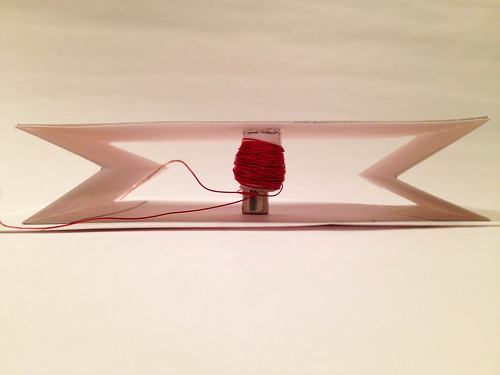
The folded legs allow the business card to move up and down smoothly and easily.
And from the top:

The wires should be alligator clipped (or otherwise connected) to an audio output. One goes to ground, the other to the audio signal (either left or right).
That should about do it. The speaker won’t be very loud if you’re driving it from your phone or computer. But try hooking it up to a proper amplifier and you should be able to make it hop. Just be careful you don’t melt your wires down.
Examples
Once you’ve got it going, you can start elaborating on the basic design:
Plain & clean.
And the reverse.
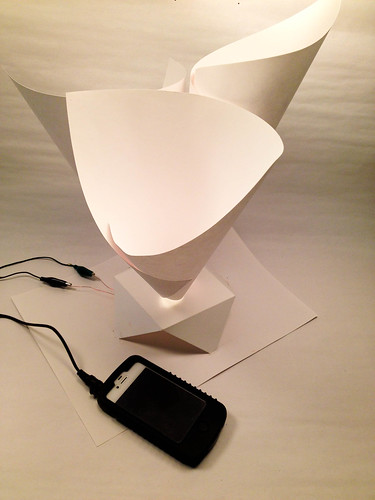
Bumping tunes through many superfluous cones.
Here’s a video where, to my eternal shame, I misspelled Gramophone (thanks, Madison, for the catch!).
Most headphone jacks are actually looking for a higher-impedance load—something like 16Ω—but I’ve never had a problem with lower values (as long as they’re not too low).
↩